Create New Entity
Overview
In this guide, you learn how to add a new entity type. It will show you how a new entity can be added to the backend API, and how to create the typical Explorer, Create, and Details stations for the Management System workflows of that entity.
See also: Extend Existing Entity
Pre-Requisites
Make sure that you have completed the Mosaic Media Template setup.
Goal
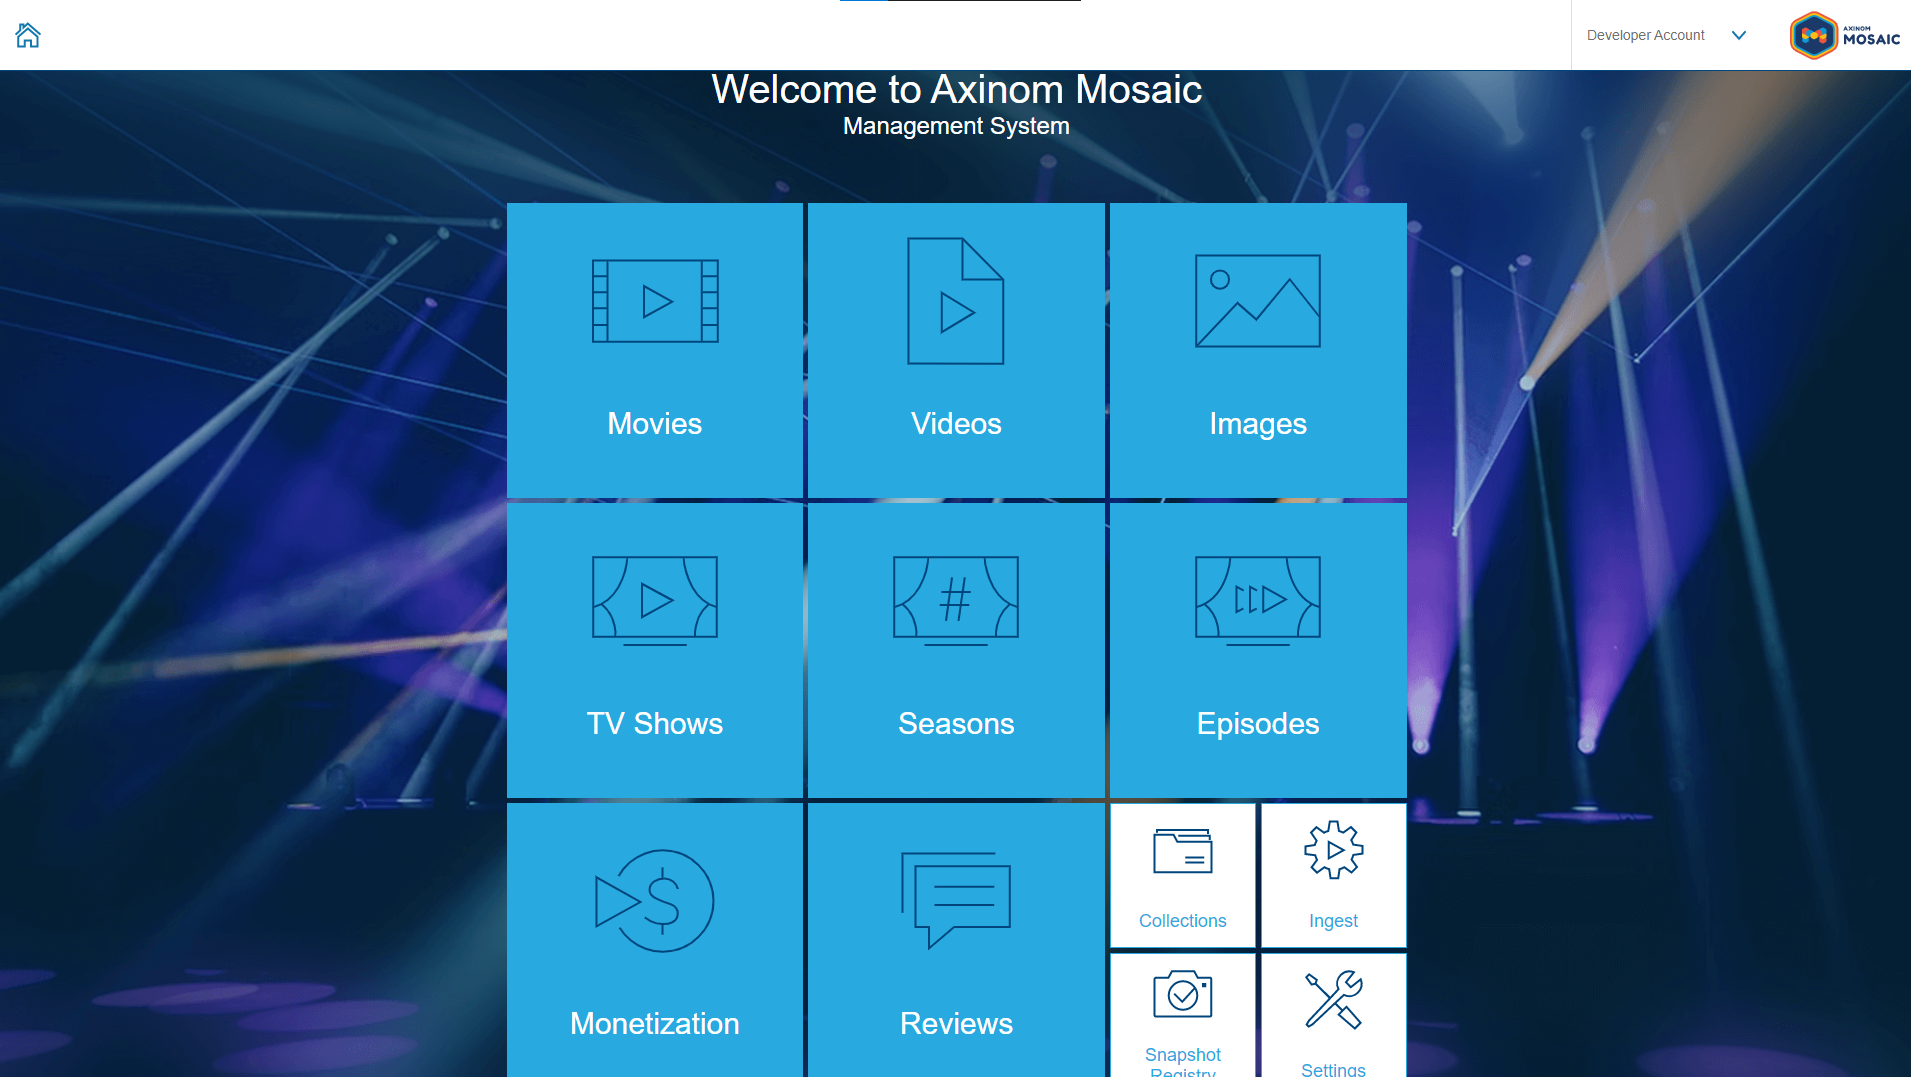
When you open the Axinom Mosaic Management System, you currently see a view like this:
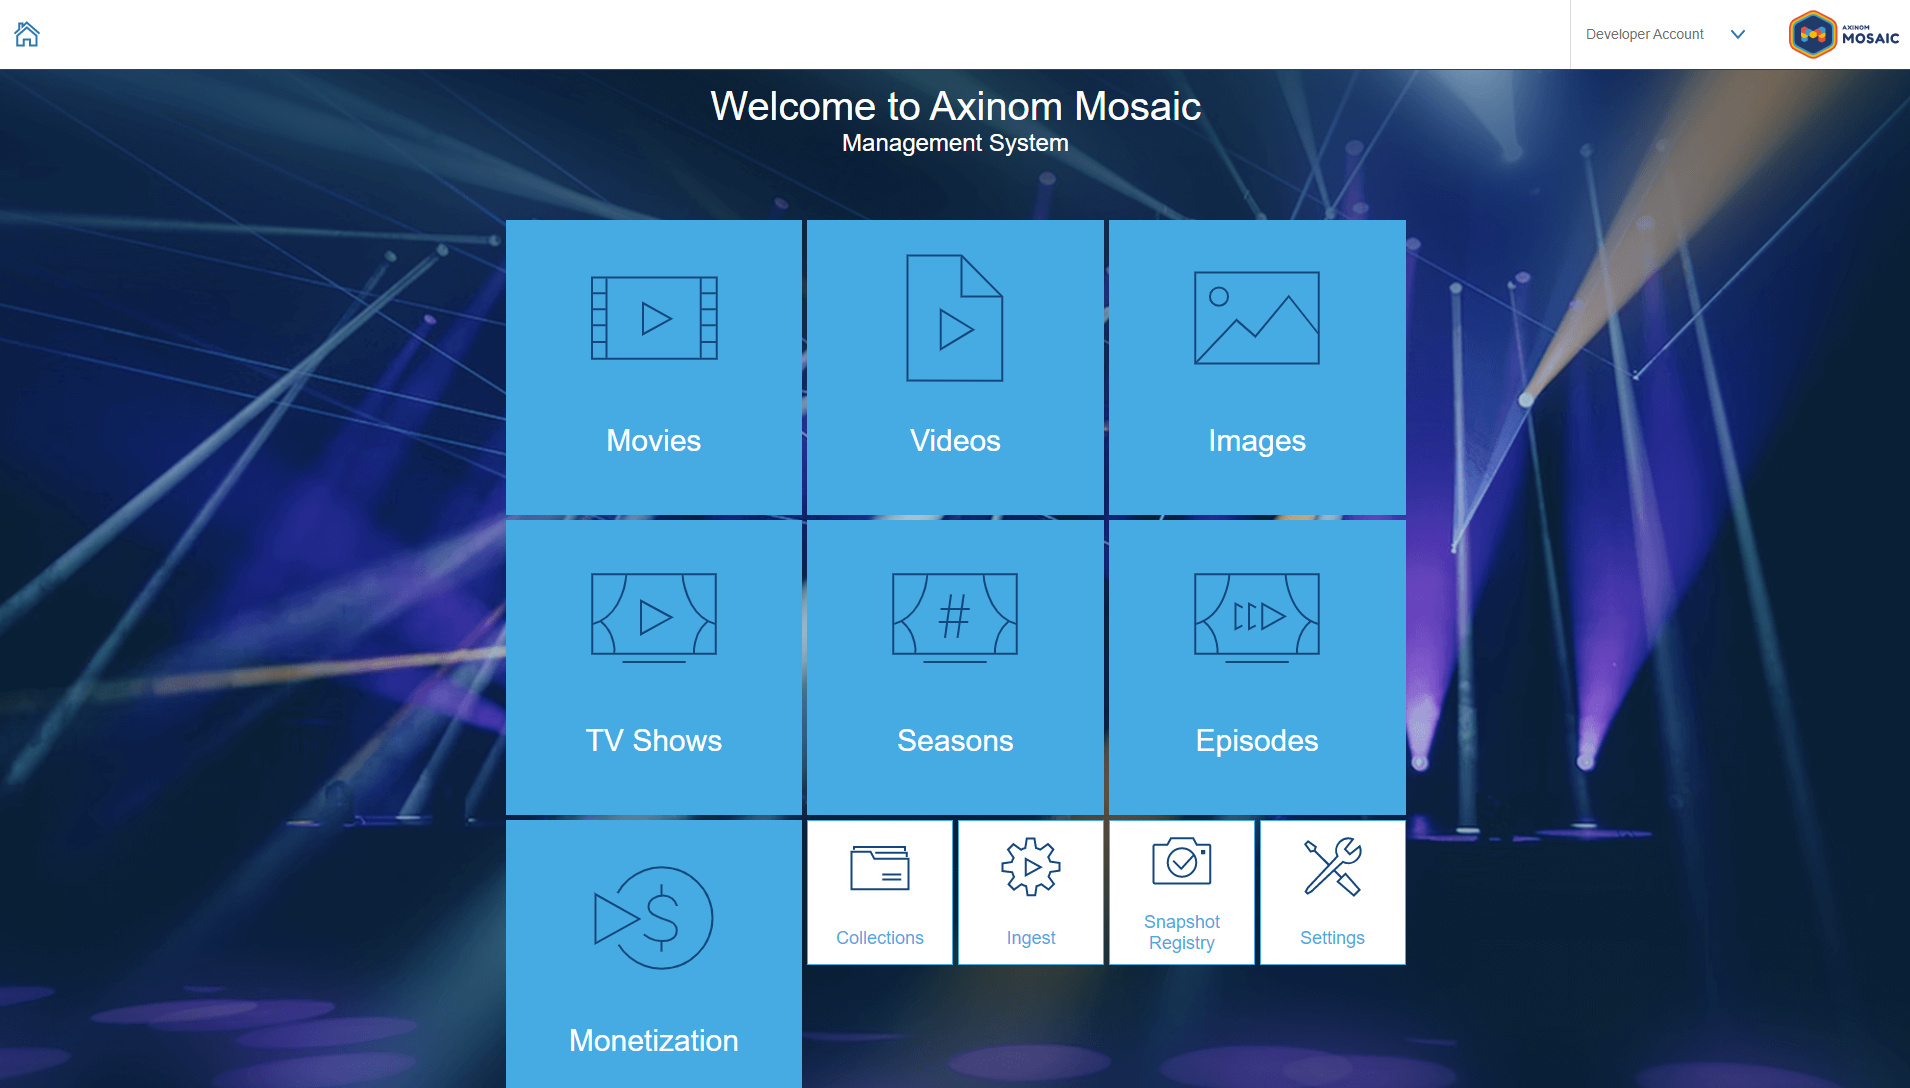
This guide aims to create a new workflow that allows the management
of Reviews, including the needed sub-stations and backend APIs, and add it
as a tile to the home screen. Reviews are written by critics, collected by
content editors, added into this system, and then published for end-users to
read.
On a high level the guide consists of two parts:
- Creating the Backend APIs for the new entity
- Creating the Stations in the Management UI that the editors will use
Creating the Backend API
First, we’ll start with creating the backend API, so the stations we will
implement in the second step will be able to load and store the Reviews data.
Creating the Database Table
To add a new entity type you start by creating a new table that will store all the
data associated with our new Reviews type.
To add a table, you first need to access the current.sql file.
This file is located under services/media/service/migrations/current.sql.
Before we start adding SQL to that file, we’re going to give the migration that we’re about to create a name. To do this, replace the first line in the file with:
--! Message: reviews-added
This name will be used when committing the migration to identify it.
Create the General Table Structure
You can manually write SQL to create the table or use a Visual Studio Code snippet that is part of the template. Follow the steps below to easily generate the general table structure, database constraints, permissions, database indexes, grants, and database notifications for your new entity type.
Once you have opened the current.sql file, type ax-add-table. This causes a pop-up to appear:
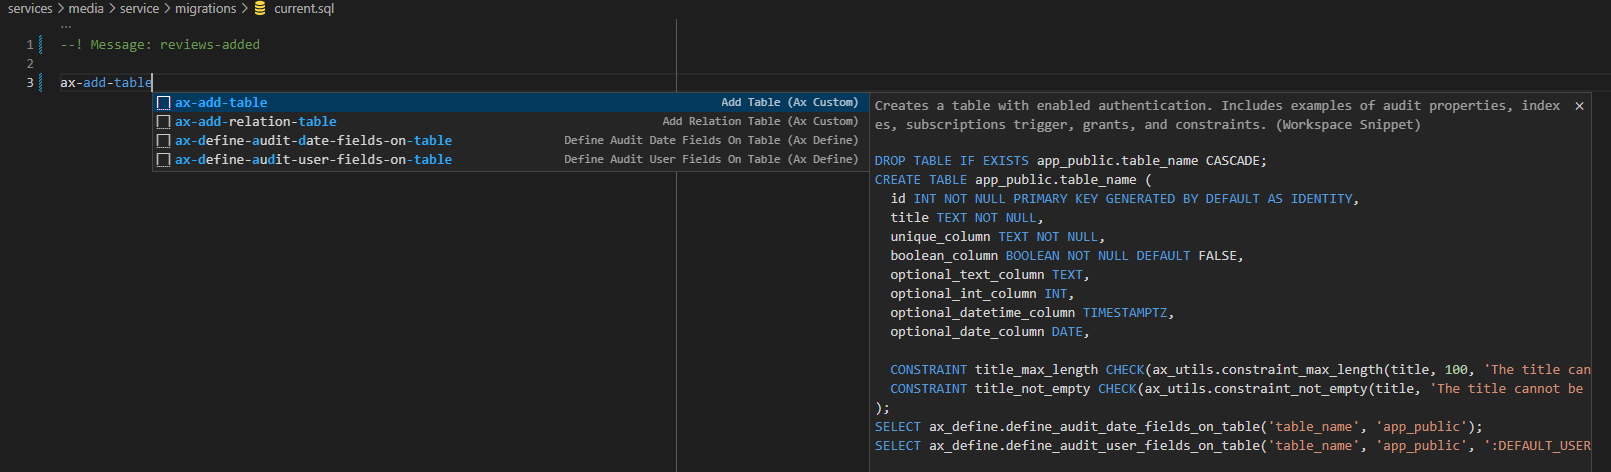
Hit 'tab' while ax-add-table is selected in the pop-up menu. This inserts a code
template for creating a new table.
After adding the code snippet, Visual Studio Code automatically highlights the
first text part that will be replaced.
- The first thing that you need to replace is the
table_name. Replace it with the name that you want the table to have. By convention, this should be the plural of your entity type name, in snake casing. In our example, it is set toreviews. - Push the tab key which automatically moves you to the next item to be
replaced: the database schema. For now, leave it as
app_public. This schema is used for tables that should appear in the GraphQL API. - Hit tab to continue to the next prompt. This prompt asks if you wish to
adjust the database role that should have access to this table. For tables that
should appear in the GraphQL API we use
DATABASE_GQL_ROLE. So we leave this unchanged and move on to the final prompt with tab. - This prompt asks you to specify what you want the singular entry (in
Capital Camel Case) to be called. Call it
Review.
Once all this information has been inserted, you should have the following result:
--! Message: reviews-added

DROP TABLE IF EXISTS app_public.reviews CASCADE;
CREATE TABLE app_public.reviews (
  id INT NOT NULL PRIMARY KEY GENERATED BY DEFAULT AS IDENTITY,
  title TEXT NOT NULL,
  unique_column TEXT NOT NULL,
  boolean_column BOOLEAN NOT NULL DEFAULT FALSE,
  optional_text_column TEXT,
  optional_int_column INT,
  optional_datetime_column TIMESTAMPTZ,
  optional_date_column DATE,

  CONSTRAINT title_max_length CHECK(ax_utils.constraint_max_length(title, 100, 'The title can only be %2$s characters long.')),
  CONSTRAINT title_not_empty CHECK(ax_utils.constraint_not_empty(title, 'The title cannot be empty.'))
);
SELECT ax_define.define_audit_date_fields_on_table('reviews', 'app_public');
SELECT ax_define.define_audit_user_fields_on_table('reviews', 'app_public', ':DEFAULT_USERNAME');

SELECT ax_define.define_authentication('REVIEWS_VIEW,REVIEWS_EDIT,ADMIN', 'REVIEWS_EDIT,ADMIN', 'reviews', 'app_public');

SELECT ax_define.define_unique_constraint('unique_column', 'reviews', 'app_public');

GRANT SELECT, DELETE ON app_public.reviews TO ":DATABASE_GQL_ROLE";
GRANT INSERT (
  title,
  unique_column
) ON app_public.reviews TO ":DATABASE_GQL_ROLE";
GRANT UPDATE (
  title,
  boolean_column,
  optional_text_column,
  optional_int_column,
  optional_datetime_column,
  optional_date_column
) ON app_public.reviews TO ":DATABASE_GQL_ROLE";

SELECT ax_define.define_subscription_triggers('id', 'reviews', 'app_public', 'reviews', 'REVIEW');
SELECT ax_define.define_indexes_with_id('title', 'reviews', 'app_public');
SELECT ax_define.define_indexes_with_id('unique_column', 'reviews', 'app_public');
SELECT ax_define.define_indexes_with_id('optional_text_column', 'reviews', 'app_public');
SELECT ax_define.define_indexes_with_id('optional_datetime_column', 'reviews', 'app_public');
SELECT ax_define.define_like_index('title', 'reviews', 'app_public');
SELECT ax_define.define_index('boolean_column', 'reviews', 'app_public');

-- TODO: After a new table is added and service is running, new GraphQL queries/mutations will become available based on GRANT statements.
--       Newly added operations must be assigned to permissions in the PermissionDefinition to become accessible.
-- TODO: Adjust SubscriptionsPlugin by adding a subscription GraphQL endpoint,
-- e.g. `SubscriptionsPluginFactory('reviews', 'Review', 'Int')`
Adjust the Create Table SQL
The template snippet generated a CREATE table statement with several example
table columns. For this guide, we need a few different columns. Start by
renaming the optional_int_column to rating. This column will hold the
numeric score that the reviewer can give.
Add a new required column via description TEXT NOT NULL, that will hold the
review description data.
Now delete all the columns that are provided in the CREATE TABLE statement
that have a prefix of optional_ as well as the boolean_column and
unique_column.
Other properties that make sense to add, but are not covered by this guide, include the name of the critic, the source where the critique was first released, maybe a release date.
Your create table SQL should now look like this:
CREATE TABLE app_public.reviews (
  id INT NOT NULL PRIMARY KEY GENERATED BY DEFAULT AS IDENTITY,
  title TEXT NOT NULL,
  description TEXT NOT NULL,
  rating INT,

  CONSTRAINT title_max_length CHECK(ax_utils.constraint_max_length(title, 100, 'The title can only be %2$s characters long.')),
  CONSTRAINT title_not_empty CHECK(ax_utils.constraint_not_empty(title, 'The title cannot be empty.'))
);
The next two lines add audit columns to the reviews table. The first line
adds the columns created_date and updated_date. Those are automatically
filled when a table row is inserted or updated.
The second line adds columns that hold the user name who created the table row
and who last updated it: created_user and updated_user.
SELECT ax_define.define_audit_date_fields_on_table('reviews', 'app_public');
SELECT ax_define.define_audit_user_fields_on_table('reviews', 'app_public', ':DEFAULT_USERNAME');
We don’t need to adjust anything there.
The line with the ax_define.define_authentication call contains already the
desired permission definition. It allows users with permissions REVIEWS_VIEW,
REVIEWS_EDIT, or ADMIN to select data from the reviews table. And it
allows users with permissions REVIEWS_EDIT or ADMIN to
insert/update/delete from that table.
The next line holds a command to define a unique constraint. This example will not have explicit unique columns, so the line can be dropped.
The next section defines the database grants to the database role
:DATABASE_GQL_ROLE. With those grants, you can define which fields from the
table should be available in the GraphQL API for queries and create/update
mutations. A delete grant will expose the delete mutation in the GraphQL API.
SELECTshould always be allowed for all fields.
You can use PostGraphile smart tags in your code to further limit which fields should be available in queries.
DELETEshould also have a full grant if you want to expose a delete mutationINSERTis often a bit more restricted so fewer fields might be exposedUPDATEshould expose all fields that should be updatable from the API
You can adjust the grants to whatever you prefer. But for our example please
remove the columns that we removed from the create table statement and add the
description and rating to insert/update so it will look like this:
GRANT SELECT, DELETE ON app_public.reviews TO ":DATABASE_GQL_ROLE";
GRANT INSERT (
  title,
  description
) ON app_public.reviews TO ":DATABASE_GQL_ROLE";
GRANT UPDATE (
  title,
  description,
  rating
) ON app_public.reviews TO ":DATABASE_GQL_ROLE";
Besides the query and mutation endpoints, GraphQL offers also subscriptions.
The line that contains SELECT ax_utils.define_subscription_triggers enables the
reviews table to be used with GraphQL subscriptions. You can leave that line as-is.
Finally, you should create table indexes to allow for faster sorting and filtering. Please adjust the section to the following:
SELECT ax_define.define_indexes_with_id('title', 'reviews', 'app_public');
SELECT ax_define.define_indexes_with_id('rating', 'reviews', 'app_public');
SELECT ax_define.define_like_index('title', 'reviews', 'app_public');
SELECT ax_define.define_like_index('description', 'reviews', 'app_public');
SELECT ax_define.define_index('rating', 'reviews', 'app_public');
For consistent paging, PostGraphile includes the database ID e.g. (ORDER BY title ASC, id). Therefore it is often best to create a combined index. The
define_indexes_with_id utility function does this for you for title and
rating, which will likely have columns in Explorer station.
The define_like_index creates an index that improves the "like" filter
performance for the title and description columns.
The define_index adds a regular btree index.
Once finished, the code should look like this:
--! Message: reviews-added

DROP TABLE IF EXISTS app_public.reviews CASCADE;
CREATE TABLE app_public.reviews (
  id INT NOT NULL PRIMARY KEY GENERATED BY DEFAULT AS IDENTITY,
  title TEXT NOT NULL,
  description TEXT NOT NULL,
  rating INT,

  CONSTRAINT title_max_length CHECK(ax_utils.constraint_max_length(title, 100, 'The title can only be %2$s characters long.')),
  CONSTRAINT title_not_empty CHECK(ax_utils.constraint_not_empty(title, 'The title cannot be empty.'))
);
SELECT ax_define.define_audit_date_fields_on_table('reviews', 'app_public');
SELECT ax_define.define_audit_user_fields_on_table('reviews', 'app_public', ':DEFAULT_USERNAME');

SELECT ax_define.define_authentication('REVIEWS_VIEW,REVIEWS_EDIT,ADMIN', 'REVIEWS_EDIT,ADMIN', 'reviews', 'app_public');

GRANT SELECT, DELETE ON app_public.reviews TO ":DATABASE_GQL_ROLE";
GRANT INSERT (
  title,
  description
) ON app_public.reviews TO ":DATABASE_GQL_ROLE";
GRANT UPDATE (
  title,
  description,
  rating
) ON app_public.reviews TO ":DATABASE_GQL_ROLE";

SELECT ax_define.define_subscription_triggers('id', 'reviews', 'app_public', 'reviews', 'REVIEW');
SELECT ax_define.define_indexes_with_id('title', 'reviews', 'app_public');
SELECT ax_define.define_indexes_with_id('rating', 'reviews', 'app_public');
SELECT ax_define.define_like_index('title', 'reviews', 'app_public');
SELECT ax_define.define_like_index('description', 'reviews', 'app_public');
SELECT ax_define.define_index('rating', 'reviews', 'app_public');
Since we’re running the service in dev mode, the migrations will be immediately applied, once the current.sql gets saved.
Based on the above definitions the GraphQL API will now include the following queries:
review- query a review by IDreviews- query all reviews with filter and paging support
The GraphQL API will now also have mutation API endpoints for the reviews entity:
createReview- create a new reviewdeleteReview- delete a review by IDupdateReview- update a review by ID
Defining Permissions
Now that the table has been added to the database, you need to define, which of the GraphQL API endpoints can be accessed with which permission.
We want users with the ADMIN or REVIEWS_EDIT permission to perform all
queries and mutations for the new entity. In addition, we want the
REVIEWS_VIEW permissions to use only the query API endpoints.
It is a good practice to first group the operations into query and mutate operations to assign them to the permissions more easily:
-
Navigate to
services/media/service/src/domains. There, create a new folderreviews. -
Inside that folder, create a new document called
operation-groups.ts. -
To start, import the queries and mutations from the generated graphql operations module.
import {
  Mutations as M,
  Queries as Q,
} from '../../generated/graphql/operations'; -
Once you have imported these, continue by defining an array that contains all the read operations for our review type. The code for this is as follows:
export const ReviewsReadOperations = [Q.review, Q.reviews]; -
Next, create a similar array for the mutate operations:
export const ReviewsMutateOperations = [
  M.createReview,
  M.deleteReview,
  M.updateReview,
];
Now, that we have grouped the operations, we need to define which permissions
they belong to. To do that, go to services/media/service/src/domains/permission-definition.ts.
This file defines all permissions that the service differentiates and which operations are permitted by each permission.
Start by adding the following import statement on top of the file, to import the Operations arrays we just created:
import {
  ReviewsMutateOperations,
  ReviewsReadOperations,
} from './reviews/operation-groups';
Then add both operations groups to the ADMIN permission.
To do so, find the ADMIN object and spread the content of both operation
arrays like this:
{
  key: 'ADMIN',
  title: 'Admin',
  gqlOperations: [
    // keep all existing operations and spread those two:
    ...ReviewsReadOperations,
    ...ReviewsMutateOperations,
  ],
},
As the second step, add the two new dedicated permissions so that not
everyone has to have the ADMIN permission to have access to the new table that
you created. To do so, navigate further down the document to find the end of the
permissions definitions array . Here, add the
REVIEWS_VIEW and REVIEWS_EDIT objects as new elements of that array, like this:
  {
    key: 'REVIEWS_VIEW',
    title: 'Reviews: View',
    gqlOperations: [...ReviewsReadOperations],
  },
  {
    key: 'REVIEWS_EDIT',
    title: 'Reviews: Edit',
    gqlOperations: [...ReviewsReadOperations, ...ReviewsMutateOperations],
  },
Once these have been added, the file should look like this:
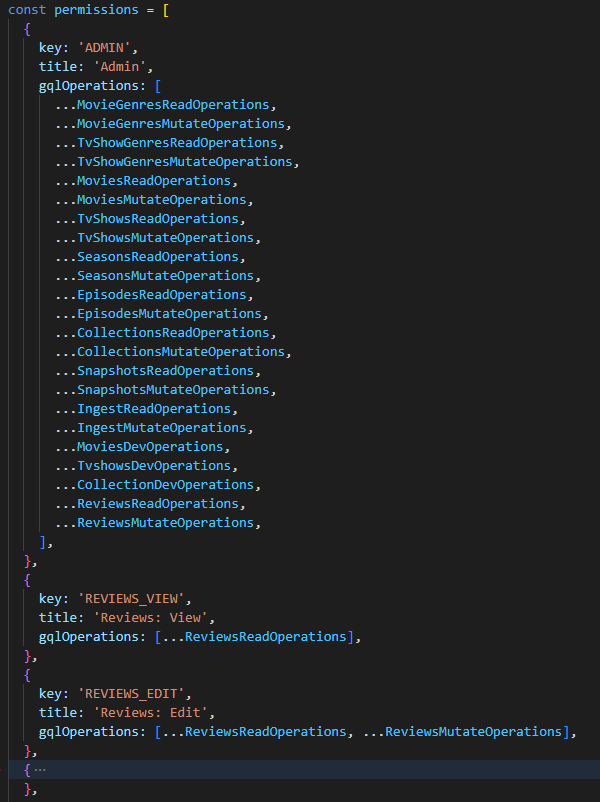
After you have declared the permissions to access the data and change it, the backend side of our new entity type is ready. In the next step, we create the workflow for the new entity type in the Management System.
Creating the Management System Workflow
To add the workflow for the new entity type we want to create the following things:
- A Home tile as entry into the Review management stations
- An 'Explorer' station that allows browsing and finding reviews
- A 'Create' station that allows the creation of new review entities
- A 'Details' station that allows editing of existing reviews
Adding the Home Tile
Let’s start by adding a tile as an entry to the Reviews on the home page. When this
tile is clicked, the user should be redirected to an 'Explorer' Station that lists all
the entities. From there, the user should be able to navigate to a 'Create' Station
to create new entities, or a 'Detail' Station to view and edit the properties of
existing entities or perform other actions on entities.
To achieve that, we need to simply make a call to the registerTile function on the PiletAPI object the microfrontend gets passed in the setup method inside the root index.tsx file.
In order to keep maintainability, we won’t add the call directly to that file though.
Instead, we will create a similar file structure that the rest of the code on the template also uses:
-
Go to
services/media/workflows/src/Stationsand create a new folderReviewswhich holds all the 'Reviews'-related code. -
Once you have created this folder, you can navigate inside it and create a new document
registrations.tsxand add the following content:import { PiletApi } from '@axinom/mosaic-portal';
import React from 'react';
import { Extensions } from '../../externals';
export function register(app: PiletApi, extensions: Extensions): void {
app.registerTile({
kind: 'home',
name: 'reviews',
path: '/reviews',
label: 'Reviews',
icon: (
<svg version="1.1" xmlns="http://www.w3.org/2000/svg" viewBox="0 0 40 40">
<path
vectorEffect="non-scaling-stroke"
fill="none"
stroke="#00467D"
strokeWidth="2"
d="M36.5,28H19.4l-7.7,6.6V28H7.5V9.3h29V28z M32.1,5.4H3.5v18.2 M13.4,15.6h18.4 M13.4,21.2h18.4"
/>
</svg>
),
type: 'large',
});
}This
registerfunction will contain all registrations we will do for our Review workflow. Right now it’s containing the call toregisterTilefunction. This registers a new tile that redirects the user to the/reviewsroute, which we’re creating next.noteAlthough we recommend defining the used icons centrally in the
src/MediaIcons/MediaIconsmodule, it’s also possible to inline them like in the code above. -
To make sure that our
registermethod is actually invoked at runtime we need to head over toservices/media/workflows/src/index.tsxand add a call to our method there.
In that file, you find calls to otherregister*functions that register the items required by other workflows. To add your newly created function, we will import it (using an alias) and then call it:Import Statement
import { register as registerReviews } from './Stations/Reviews/registrations';Function Call
registerReviews(app, extensions);Once these statements have been added, the file should look something like this:
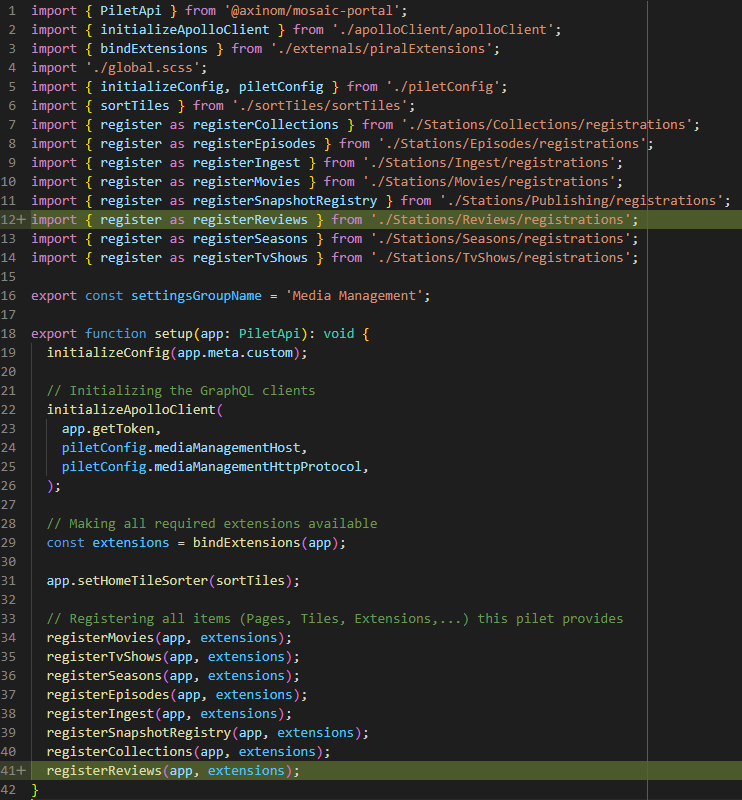
With this updated index file in place, you should be able to see the new tile rendered on the home page.
The tile will not work yet, because we haven’t implemented the station that should be served on that route to which the user gets redirected to. This is what we will do next.
Adding the Explorer Station
Explorer stations usually make use of the NavigationExplorer component provided by the @axinom/mosaic-ui library. This component will care for most of the logic and UI of the station already. There are two crucial pieces that we need to provide to it:
- A
dataProvider, that will connect the Explorer to the backend and - a
columnsarray that defines the columns we want to show for each entity
There is also a second 'Explorer' component called SelectionExplorer which is tailored for scenarios where entities should be selected. This is usually used as browsing experience when associating entities.
To create the Explorer station:
-
Navigate to
services/media/workflows/src/Stations/Reviewsand create a new folderReviewsExplorerwhere the code for the Explorer shall be located. -
The first file we’re going to add is a
graphqlfile. This file is used to define the queries that the station executes. In our case, we call that fileReviewsExplorer.graphql.
Add the following code into the file:query Reviews(
$filter: ReviewFilter
$orderBy: [ReviewsOrderBy!]
$after: Cursor
) {
filtered: reviews(
filter: $filter
orderBy: $orderBy
first: 30
after: $after
) {
totalCount
pageInfo {
hasNextPage
endCursor
}
nodes {
id
title
rating
createdDate
updatedDate
}
}
nonFiltered: reviews {
totalCount
}
}This query will be used by the
dataProvider. It reads all theReviewsfrom the backend API. You can also specify filters and a sort order as well as passing aCursorwhich you can use for pagination.For each Review, it loads the
id,title,rating,createDate, andupdatedDate. These are the values we want to show for each item in the explorer.In addition, it’s loading the
totalCountof the query, as well as thenonFilteredtotalCount. This is something thedataProvideris expected to return to the Explorer. These values will be shown to the editor to inform them about the total amount of items they can expect depending on their filter configuration, etc.Lastly, ask the API to return the
endCursor, which will be used to query for the next page when needed, and thehasNextPagevalue to understand when you reach the end of the list.noteThe
ApolloGraphQLextension for Visual Studio Code provides syntax completion for the queries and their properties when writing this file. Alternatively, you can use the/graphiqlendpoint on the backend service to visually create the queries and test them directly against the service. -
Once you have saved this file, you need to run the
codegenscript found underservices/media/workflows/package.json. This script generates the necessary code to use the queries in your code.noteWhenever you edit a GraphQL query or mutation, or the schema of your service was changed, you can use the
codegenscript to update the generated code to the new state of the schema. -
Next, create a new file within the same directory as the query file called
ReviewsExplorer.tsx. This file holds the React component that you use for your Explorer route. -
Add the following code into the file:
import {
  Column,
  DateRenderer,
  ExplorerDataProvider,
  NavigationExplorer,
  sortToPostGraphileOrderBy,
} from '@axinom/mosaic-ui';
import React from 'react';
import { client } from '../../../apolloClient';
import {
  ReviewsDocument,
  ReviewsOrderBy,
  ReviewsQuery,
  ReviewsQueryVariables,
} from '../../../generated/graphql';

type ReviewData = NonNullable<ReviewsQuery['filtered']>['nodes'][number];

export const ReviewsExplorer: React.FC = () => {
  // Columns
  const explorerColumns: Column<ReviewData>[] = [
    { label: 'Title', propertyName: 'title' },
    { label: 'Rating', propertyName: 'rating' },
    { label: 'Created At', propertyName: 'createdDate', render: DateRenderer },
    { label: 'Updated At', propertyName: 'updatedDate', render: DateRenderer },
  ];

  // Data provider
  const dataProvider: ExplorerDataProvider<ReviewData> = {
    loadData: async ({ pagingInformation, sorting }) => {
      const result = await client.query<ReviewsQuery, ReviewsQueryVariables>({
        query: ReviewsDocument,
        variables: {
          orderBy: sortToPostGraphileOrderBy(sorting, ReviewsOrderBy),
          after: pagingInformation,
        },
        fetchPolicy: 'network-only',
      });

      return {
        data: result.data.filtered?.nodes ?? [],
        totalCount: result.data.nonFiltered?.totalCount as number,
        filteredCount: result.data.filtered?.totalCount as number,
        hasMoreData: result.data.filtered?.pageInfo.hasNextPage || false,
        pagingInformation: result.data.filtered?.pageInfo.endCursor,
      };
    },
  };

  return (
    <NavigationExplorer<ReviewData>
      title="Reviews"
      stationKey="ReviewsExplorer"
      columns={explorerColumns}
      dataProvider={dataProvider}
    />
  );
};noteIf Visual Studio Code shows errors on the imports from
../../../generated/graphql, just navigate to the file and open it once to make Visual Studio Code aware of the changes in that file.This is essentially a regular (functional) React component that renders a
NavigationExplorer, provided by the Mosaic UI library.The
NavigationExplorerexpects a few props that you need to pass down. As mentioned above, the most important ones aredataProviderandcolumns.The
dataProvidersneeds to be an object that defines (at least) aloadDatamethod. The Explorer uses that function whenever it needs to load additional data. It is the job of your component to load the required data and return it (along with a few additional properties) from that function.To do that, the code above simply executes the query that we defined in the
Reviews.graphqlfile and pick the needed information from the return object.
It also uses thesortToPostGraphileOrderBymethod to 'translate' the sorting order returned by the explorer into query variables that will be understood by the Postgraphile backend.The
columnsprop specifies the columns the Explorer shall have. The code adds a column definition for each property that we query except theid.For the date fields, use the optional
renderproperty to specify a render function that is used to render the values of that column to the list. -
The last thing we need to do before the page starts working is to register the page inside the
Stations/Reviews/registrations.tsxfile.To do this, add the following import statement to the top of the file:
import { ReviewsExplorer } from './ReviewsExplorer/ReviewsExplorer';and add this
registerPagecall to theregistermethod:app.registerPage('/reviews', ReviewsExplorer, {
breadcrumb: () => 'Reviews',
});This registers the component to be served on the route
/reviews, which is also the route for the tile that we already added.The call also specifies a
BreadCrumbResolver. This tells the Mosaic orchestration how to represent the station in the breadcrumb. In this case, we will just return the static string 'Reviews'.When you attempt to access the
/reviewsroute (e.g. through the home tile), you should see the Explorer station that we just created.noteTo see that the query is actually working and fetching the data at this point, it might be useful to have some examples created. You could use the GraphiQL endpoint of the service
http://localhost:10200/graphiqlfor this purpose. Here, you can use thecreateReviewmutations to create some test data if you like.
To access the API, a permissions token is needed. This needs to be provided asBearertoken in theAuthorizationheader of the requests. (like:"Authorization": "Bearer your_token")
A token can be generated using theutil:tokenscript found underservices/media/service/package.json.
Adding the Create Station
Now that the Explore page is created we want to add a station that allows creating review instances from the UI.
This station will use the Create component as its base. This component is very similar to the Detail component that we will use later for our detail station. It’s just optimized for the process of creating records rather than changing records.
-
Navigate to
services/media/workflows/src/Stations/Reviewsand create a new folderReviewCreate. -
Inside this folder, create a file called
ReviewCreate.graphqland add the following code to it:mutation CreateReview($input: CreateReviewInput!) {
createReview(input: $input) {
review {
id
}
}
}This bit of code executes the
createReviewmutation which creates a new review according to ourCreateReviewInputand returns theidof the created entity.noteIf Visual Studio Code shows some errors on that code, try running the 'Apollo: Reload Schema' Visual Studio Code command to make it aware of the recent changes we did to the GraphQL Schema.
-
After saving the file, we have to run the
codegenscript found underservices/media/workflows/package.jsonto let the solution create the typings for our new query. -
Next, we’re going to create a station that will display the form where the user can enter their data.
Underservices/media/workflows/src/Stations/Reviews/ReviewCreate, create a new file calledReviewCreate.tsxand add the following code:import {
ActionHandler,
Create,
SingleLineTextField,
TextAreaField,
} from '@axinom/mosaic-ui';
import { Field } from 'formik';
import { ObjectSchemaDefinition } from 'ObjectSchemaDefinition';
import React, { useCallback } from 'react';
import { useHistory } from 'react-router-dom';
import { object, string } from 'yup';
import { client } from '../../../apolloClient';
import {
CreateReviewMutation,
CreateReviewMutationVariables,
useCreateReviewMutation,
} from '../../../generated/graphql';
type FormData = CreateReviewMutationVariables['input']['review'];
type SubmitResponse = CreateReviewMutation['createReview'];
const reviewCreateSchema = object().shape<ObjectSchemaDefinition<FormData>>({
title: string().required('Title is a required field').max(100),
description: string().required('Description is a required field').max(5000),
});
export const ReviewCreate: React.FC = () => {
const [reviewCreate] = useCreateReviewMutation({
client: client,
fetchPolicy: 'no-cache',
});
const saveData = useCallback(
async (formData: FormData): Promise<SubmitResponse> => {
return (
await reviewCreate({
variables: {
input: {
review: {
title: formData.title,
description: formData.description,
},
},
},
})
).data?.createReview;
},
[reviewCreate],
);
const history = useHistory();
const onProceed = useCallback<ActionHandler<FormData, SubmitResponse>>(
({ submitResponse }) => {
history.push(`/reviews/${submitResponse?.review?.id}`);
},
[history],
);
return (
<Create<FormData, SubmitResponse>
title="New Review"
subtitle="Add new review metadata"
validationSchema={reviewCreateSchema}
saveData={saveData}
onProceed={onProceed}
cancelNavigationUrl="/reviews"
initialData={{
loading: false,
}}
>
<Field name="title" label="Title" as={SingleLineTextField} />
<Field name="description" label="Description" as={TextAreaField} />
</Create>
);
};At its heart that station is using the
Createcomponent provided by@axinom/mosaic-ui.We’re passing the input fields we want to show as
Fieldcomponents as the children of the component. It is a good practice to just add fields here that are required for a valid entity. The optional properties can then later be edited on the details station we will create later.In addition, we’re passing a
validationSchemato it, which contains the validation rules for the entity.
We’re also passing asaveDatamethod down, which implements the saving logic for the new entity. This method uses the previously createdCreateReviewmutation to persist the entity in the backend.The
onProceedmethod is being called, after the saving to the backend succeeded. The method gets passed thesubmitResponse, which we can use to calculate the route where the user should be redirected. We already set it to the route, where our details page will soon be created at. -
With the station ready, let’s add the route by visiting the
registrations.tsxfile found underservices/media/workflows/src/Stations/Reviews/registrations.tsxand importing our station there:import { ReviewCreate } from './ReviewCreate/ReviewCreate';and then adding the following code to the
registermethod.app.registerPage('/reviews/create', ReviewCreate, {
breadcrumb: () => 'New Review',
});This registers the station at route
/reviews/createand defines the breadcrumb value of it asNew Review. -
Once this has been completed, you should be able to visit http://localhost:10053/reviews/create and see your reviews create page.
noteCurrently, when you create a new review, you will be seeing a 404 error because of the missing details page. The entity will still be created though and you should be able to see it in the explorer already.
Adding a Create Tile to the Reviews Explorer
We now have a way to access the station by knowing the route, but we also want to link it up in the Explorer or course.
Let’s head over to the Explorer station (at services/media/workflows/src/Stations/Reviews/ReviewsExplorer/ReviewsExplorer.tsx) and add the following import first:
import { useHistory } from 'react-router-dom';
Now that we have imported useHistory, we can create a const history. Add the following
code in the ReviewsExplorer const:
export const ReviewsExplorer: React.FC = () => {
  const history = useHistory();           // <-- Add this line

  ...

  return (
    <NavigationExplorer<ReviewData>
      title="Reviews"
      stationKey="ReviewsExplorer"
      columns={explorerColumns}
      dataProvider={dataProvider}
      onCreateAction={() => {             // <---- Add this line
        history.push(`/reviews/create`); // <---- Add this line
      }}                                  // <---- Add this line
    />
  );
}
By passing down the onCreateAction prop, the Explorer will start rendering a + button on the top right which executes our handler when being clicked.
The function we pass down will navigate the user to the new route.
The ReviewsExplorer.tsx document should resemble the following:
import {
  Column,
  DateRenderer,
  ExplorerDataProvider,
  NavigationExplorer,
  sortToPostGraphileOrderBy,
} from '@axinom/mosaic-ui';
import React from 'react';
import { useHistory } from 'react-router-dom';
import { client } from '../../../apolloClient';
import {
  ReviewsDocument,
  ReviewsOrderBy,
  ReviewsQuery,
  ReviewsQueryVariables,
} from '../../../generated/graphql';

type ReviewData = NonNullable<ReviewsQuery['filtered']>['nodes'][number];

export const ReviewsExplorer: React.FC = () => {
  const history = useHistory();

  // Columns
  const explorerColumns: Column<ReviewData>[] = [
    { label: 'Title', propertyName: 'title' },
    { label: 'Rating', propertyName: 'rating' },
    { label: 'Created At', propertyName: 'createdDate', render: DateRenderer },
    { label: 'Updated At', propertyName: 'updatedDate', render: DateRenderer },
  ];

  // Data provider
  const dataProvider: ExplorerDataProvider<ReviewData> = {
    loadData: async ({ pagingInformation, sorting }) => {
      const result = await client.query<ReviewsQuery, ReviewsQueryVariables>({
        query: ReviewsDocument,
        variables: {
          orderBy: sortToPostGraphileOrderBy(sorting, ReviewsOrderBy),
          after: pagingInformation,
        },
        fetchPolicy: 'network-only',
      });

      return {
        data: result.data.filtered?.nodes ?? [],
        totalCount: result.data.nonFiltered?.totalCount as number,
        filteredCount: result.data.filtered?.totalCount as number,
        hasMoreData: result.data.filtered?.pageInfo.hasNextPage || false,
        pagingInformation: result.data.filtered?.pageInfo.endCursor,
      };
    },
  };

  return (
    <NavigationExplorer<ReviewData>
      title="Reviews"
      stationKey="ReviewsExplorer"
      columns={explorerColumns}
      dataProvider={dataProvider}
      onCreateAction={() => {
        history.push(`/reviews/create`);
      }}
    />
  );
};
Adding the Details Station
In this section, we will add the details page. This page will be used for editing the properties of existing entities and potentially executing further actions on an entity.
-
Start by adding a new folder called
ReviewDetailsinside the Reviews directory located atservices/media/workflows/src/Stations/Reviews. -
Inside this folder, create a new file titled
ReviewDetails.graphql. -
Add the following code into the newly created document:
query Review($id: Int!) {
  review(id: $id) {
    title
    rating
    description
    id
    createdDate
    createdUser
    updatedDate
    updatedUser
  }
}

mutation UpdateReview($input: UpdateReviewInput!) {
  updateReview(input: $input) {
    review {
      id
      title
    }
  }
}

mutation DeleteReview($input: DeleteReviewInput!) {
  deleteReview(input: $input) {
    clientMutationId
  }
}

query ReviewTitle($id: Int!) {
  review(id: $id) {
    title
  }
}
This code defines two queries and two mutations. The first query will be used to load the current values of the entity. The update mutation will be used when the entity should be saved/updated. The delete mutation will be used for an action button that will enable the deletion of a review. The query at the bottom will be used by the breadcrumb resolver, to be able to show the title of the entity in the breadcrumb of the Management System.
-
Once the code has been added to the
ReviewDetails.graphqland saved, you need to run thecodegenscript once more. -
Once the codegen script finishes, add another file called
ReviewDetails.tsxthat will hold the code of our station:import {
Details,
DetailsProps,
getFormDiff,
IconName,
Nullable,
SingleLineTextField,
TextAreaField,
} from '@axinom/mosaic-ui';
import { Field } from 'formik';
import { ObjectSchemaDefinition } from 'ObjectSchemaDefinition';
import React, { useCallback } from 'react';
import { useHistory, useParams } from 'react-router-dom';
import { number, object, string } from 'yup';
import { client } from '../../../apolloClient';
import {
MutationUpdateReviewArgs,
useDeleteReviewMutation,
useReviewQuery,
useUpdateReviewMutation,
} from '../../../generated/graphql';
type FormData = Nullable<MutationUpdateReviewArgs['input']['patch']>;
const reviewDetailSchema = object<ObjectSchemaDefinition<FormData>>({
title: string().required('Title is a required field').max(100),
description: string().required('Description is a required field').max(5000),
rating: number().max(100).min(0),
});
export const ReviewDetails: React.FC = () => {
const reviewId = Number(
useParams<{
reviewId: string;
}>().reviewId,
);
const { loading, data, error } = useReviewQuery({
client,
variables: { id: reviewId },
fetchPolicy: 'no-cache',
});
const [updateReview] = useUpdateReviewMutation({
client,
fetchPolicy: 'no-cache',
});
const onSubmit = useCallback(
async (
formData: FormData,
initialData: DetailsProps<FormData>['initialData'],
): Promise<void> => {
await updateReview({
variables: {
input: {
id: reviewId,
patch: getFormDiff(formData, initialData.data),
},
},
});
},
[reviewId, updateReview],
);
const history = useHistory();
const [deleteReviewMutation] = useDeleteReviewMutation({
client,
fetchPolicy: 'no-cache',
});
const deleteReview = async (): Promise<void> => {
await deleteReviewMutation({ variables: { input: { id: reviewId } } });
history.push('/reviews');
};
return (
<Details<FormData>
defaultTitle="Review"
titleProperty="title"
subtitle="Properties"
validationSchema={reviewDetailSchema}
initialData={{
data: data?.review,
loading,
error: error?.message,
}}
saveData={onSubmit}
actions={[
{
label: 'Delete',
icon: IconName.Delete,
confirmationMode: 'Simple',
onActionSelected: deleteReview,
},
]}
>
<Form />
</Details>
);
};
const Form: React.FC = () => {
return (
<>
<Field name="title" label="Title" as={SingleLineTextField} />
<Field name="description" label="Description" as={TextAreaField} />
<Field
name="rating"
type="number"
label="Rating"
as={SingleLineTextField}
/>
</>
);
};As mentioned before, this code follows a lot of the patterns that we also used in the create station. There are a few notable differences though:
-
On loading the station, we read the requested ID from the query parameters and query the current data from the backend.
-
We use the
initialDataproperty to send information about theloadingstate, thedataof the entity, and potential errors that occurred when trying to load the data to theDetailscomponent. -
We set the
saveDataprop to a function that will care for persisting the data. This method will be called whenever the data should be saved (e.g. when the user did some changes and leaves the station). We use thegetFormDiffmethod, to determine the changes the user did, to only patch these properties in order to do the minimal possible change on the entity. -
Compared to the create station the form of this station defines
Fieldcomponents and validation rules for each property that the entity has, not only the required ones. -
We also map the execution of deleteReviewMutation to an action button and navigate back to the Reviews explorer on successful completion.
-
Before registering the route for the station, we want to create a new file titled
ReviewDetailsCrumb.ts. This file will hold ourBreadcrumbResolverfor the station. For detail pages, we usually want to display the title of the entity that is being edited in the breadcrumb instead of a static string. To do that, we add the following code to the file:import { BreadcrumbResolver } from '@axinom/mosaic-portal';
import { client } from '../../../apolloClient';
import {
ReviewTitleDocument,
ReviewTitleQuery,
} from '../../../generated/graphql';
export const ReviewDetailsCrumb: BreadcrumbResolver = (params) => {
return async (): Promise<string> => {
const response = await client.query<ReviewTitleQuery>({
query: ReviewTitleDocument,
variables: {
id: Number(params['reviewId']),
},
errorPolicy: 'ignore',
});
return response.data.review?.title || 'Review Details';
};
};
-
-
Once this code has been added, add the route to the
registrations.tsxfile located atservices/media/workflows/src/Stations/Reviews. For this, import the two files you just created:import { ReviewDetails } from './ReviewDetails/ReviewDetails';
import { ReviewDetailsCrumb } from './ReviewDetails/ReviewDetailsCrumb';and register the page by adding the following code to the
registermethod:app.registerPage('/reviews/:reviewId', ReviewDetails, {
breadcrumb: ReviewDetailsCrumb,
});
Adding Links to the Details Station to the Explorer
In order to complete the Details Station we want to make sure that the entities shown in the Explorer link to their corresponding Details page.
-
To do that, we need to head over to the
ReviewsExplorer.tsxfile located atservices/media/workflows/src/Stations/Reviews/ReviewsExplorer. -
In there, navigate to the return section of the file and add the following code:
return (
    <NavigationExplorer<ReviewData>
      title="Reviews"
      stationKey="ReviewsExplorer"
      columns={explorerColumns}
      dataProvider={dataProvider}
      onCreateAction={() => {
        history.push(`/reviews/create`);
      }}
      calculateNavigateUrl={({ id }) => { // <-- Add this line
        return `/reviews/${id}`;         // <-- Add this line
      }}                                  // <-- Add this line
    />
);
The
calculateNavigateUrlprop is used by the Explorer to determine the link each item in the list should get. The method we pass down receives theidof the element and calculates the route using the same format we registered the station with. -
Upon completion, the file should look like this:
import {
  Column,
  DateRenderer,
  ExplorerDataProvider,
  NavigationExplorer,
  sortToPostGraphileOrderBy,
} from '@axinom/mosaic-ui';
import React from 'react';
import { useHistory } from 'react-router-dom';
import { client } from '../../../apolloClient';
import {
  ReviewsDocument,
  ReviewsOrderBy,
  ReviewsQuery,
  ReviewsQueryVariables,
} from '../../../generated/graphql';

type ReviewData = NonNullable<ReviewsQuery['filtered']>['nodes'][number];

export const ReviewsExplorer: React.FC = () => {
  const history = useHistory();

  // Columns
  const explorerColumns: Column<ReviewData>[] = [
    { label: 'Title', propertyName: 'title' },
    { label: 'Rating', propertyName: 'rating' },
    { label: 'Created At', propertyName: 'createdDate', render: DateRenderer },
    { label: 'Updated At', propertyName: 'updatedDate', render: DateRenderer },
  ];

  // Data provider
  const dataProvider: ExplorerDataProvider<ReviewData> = {
    loadData: async ({ pagingInformation, sorting }) => {
      const result = await client.query<ReviewsQuery, ReviewsQueryVariables>({
        query: ReviewsDocument,
        variables: {
          orderBy: sortToPostGraphileOrderBy(sorting, ReviewsOrderBy),
          after: pagingInformation,
        },
        fetchPolicy: 'network-only',
      });

      return {
        data: result.data.filtered?.nodes ?? [],
        totalCount: result.data.nonFiltered?.totalCount as number,
        filteredCount: result.data.filtered?.totalCount as number,
        hasMoreData: result.data.filtered?.pageInfo.hasNextPage || false,
        pagingInformation: result.data.filtered?.pageInfo.endCursor,
      };
    },
  };

  return (
    <NavigationExplorer<ReviewData>
      title="Reviews"
      stationKey="ReviewsExplorer"
      columns={explorerColumns}
      dataProvider={dataProvider}
      onCreateAction={() => {
        history.push(`/reviews/create`);
      }}
      calculateNavigateUrl={({ id }) => {
        return `/reviews/${id}`;
      }}
    />
  );
};
With that step, the implementation of our new entity type is finished. It is accessible from the homepage, and allows browsing, creation, editing, and deletion of entities.
Committing the Database Migration
Once we confirmed that everything is working as expected and we’re happy with the results we should commit the database migration, so it can correctly be applied on deployment.
To do that, just run the db:commit script of the media service.
Any changes you want to do to the table after you committed the migration need to become a new migration, migrating the then committed state into the new, desired state.
Complete changes overview
If you are interested in seeing the full changeset produced by following this guide, it is available from a dedicated commit in our github repository.
Next steps
This guide only scratches the surface of what you can do with Axinom Mosaic. Feel free to explore the implementation of the other entities in the template, to learn more about advanced concepts like:
- Entity filters in Explorers
- Add relations to the movie and episode type
- Entity actions & bulk actions
- Custom GraphQL Schema extensions
- Entities with more complex data structure